 Real Estate Camera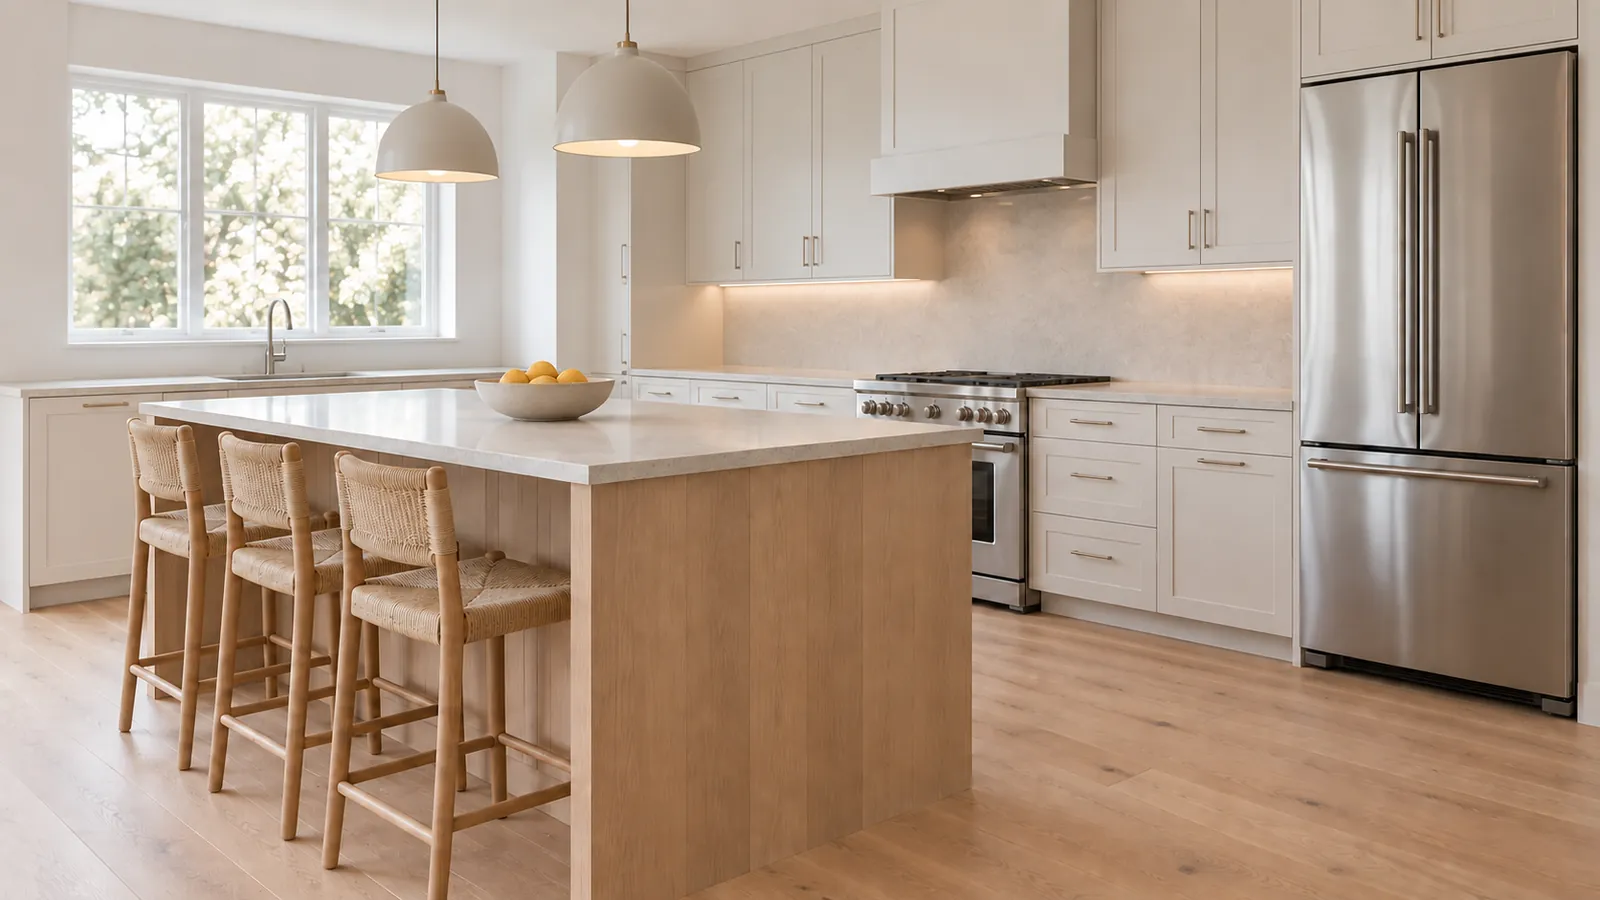
To photograph a kitchen for a property listing, clear the benches, switch on every light in the room, and shoot from the corner that captures the most cupboards and the island bench in one frame. Hold the camera level and a little higher than you would in other rooms, then set the exposure for the cupboards rather than the window. Take a second wide shot from the opposite side and a detail shot of the kitchen's best feature.
That's the short version. The rest of this page looks at the things that most often go wrong: stainless steel, a window above the sink, and a bench the seller insists is already clear.
Prepare the kitchen before you pick up the camera
Kitchens collect more clutter than any other room, and all of it shows up in a wide-angle photo. I spend more time clearing a kitchen than photographing it.
- Benches: toaster, coffee machine, knife block, paper towels, fruit bowl full of bananas, mail. Put it all away in a cupboard.
- Sink: dishwashing liquid, sponge, dish rack, scrubber on the tap. Empty the sink completely.
- Fridge door: magnets, calendars, kids' drawings, takeaway menus. Buyers read every one when they zoom in.
- Floor: rubbish bin, pet bowls, mat in front of the sink.
- Stainless steel fronts: wipe fingerprints off the fridge and dishwasher, then the oven door and microwave. Zillow's photo tips for sellers highlight this too, but it's the thing people forget.
Leave one or two items. A chopping board leaning against the splashback, or a bowl of lemons on the island bench. A kitchen with nothing on it at all can look like a rental that's never been lived in, but a kitchen with five decorative items looks cluttered in a photo, even if it didn't look cluttered in person.
Open the blinds above the sink and tuck the stools under the island bench so they're evenly spaced. Stools lined up unevenly are the kitchen equivalent of a crooked picture frame.
Where to stand
The main shot: corner, cabinets and island together
Walk through the room and find the corner that captures the longest run of cabinets and the island in one frame. This is usually the corner diagonally opposite the cooktop, or just inside the doorway from the family room. The aim is depth: two walls of cabinetry receding into the distance, with the island in the middle ground.
Avoid letting the island fill the bottom third of the frame. If you stand right up against it, all you'll capture is the edge of the benchtop and a lot of stone. Take a step or two back.
The second shot: the reverse angle
Shoot from the far side of the island, looking back the way you came. In an open-plan layout, this is the shot that shows how the kitchen connects to the family room or dining area. Buyers look for this view. If the kitchen is separate, shoot from the doorway towards the window instead.
The detail shot
Take one close-up shot, showing only something worth capturing: a cooktop and rangehood, a butler sink, a tiled splashback, a wine fridge or a walk-in pantry. Switch to the 1x lens or a standard focal length for this shot. An ultra-wide lens distorts details at close range.
Galley kitchens are the exception to all of this. There's no corner to stand in, so shoot from one end towards the other, keeping the camera centred, then shoot from the opposite end if the two ends look different. Two shots are plenty.
Camera height and keeping it level
In most rooms, I hold the camera at about light-switch height. In a kitchen, I hold it a few inches higher, roughly level with the splashback. From a lower position, the benches shrink to a thin line, and you lose sight of what buyers want to see: the amount of benchtop space.
The height changes, but the rule doesn't: keep the camera level. Raise it; don't angle it down. The moment you tilt down to capture more benchtop, the upper cabinets start leaning inwards and the fridge looks as though it's falling over. Kitchens are full of vertical lines, from cabinet edges to the fridge and the rangehood, so even a slight tilt is obvious here in a way it might not be in a bedroom.
On a phone, turn on the grid and the level, then align a cabinet edge with one of the vertical grid lines. If they run parallel, you're square. The guide to correcting leaning vertical lines explains what to do if a shot doesn't quite line up.
Lights: turn them all on
Ceiling lights, pendants over the island, under-cabinet strips, the range hood light. Every single one. Under-cabinet lights matter more than people realise, because without them the splashback sits in shadow under the upper cabinets and looks like a dark stripe across the photo.
The catch is colour. Kitchen lightbulbs tend to be warm, the window brings in daylight, and under-cabinet LEDs are often a third colour. You'll get a yellow cast near the lights and a cooler tone near the window. I leave the lights on anyway. A colour cast can be corrected afterwards. A dark kitchen with one bright window is much harder to correct.
If you can, ask the seller to replace any dead lightbulbs a few days before the shoot and to use the same colour of lightbulb in each fitting. That one request does more than any amount of editing.
The window over the sink
Most kitchens have a window right where you want to point the camera. A phone or camera will try to expose for it, and the rest of the kitchen goes dark. Tap the cabinets or a wall to set the exposure for that area instead. On an iPhone, touch and hold until AE/AF Lock appears, so the setting stays fixed as you reframe.
You'll lose most of the view out the window in a single exposure. That's normal. The phone's built-in HDR will blend some of it back in, and editing can restore more. Avoid exposing for the window and leaving the cabinets looking muddy. Nobody is buying the view out of the kitchen window.
Shoot kitchens when the sun isn't shining straight through that window. Strong sunlight on the benchtop blows out to white and draws the eye to the wrong part of the room. Bright overcast conditions are ideal.
Stainless steel, glass and other reflections
A stainless-steel fridge is a mirror with handles. So are the oven door, the microwave, a glass cabinet front and a glossy splashback. Before each shot, check every reflective surface in the frame for three things:
- You. Step out of the fridge's line of sight, or shoot it from a steeper angle. Use the phone's timer or a remote shutter and leave the room if you have to.
- The flash, if it went off. Turn it off. A flash in a kitchen creates a bright hotspot on every shiny surface and makes the room look flat.
- Pendant lights reflected in the glass cabinet fronts. Move a foot to the left or right and they'll usually shift out of the way.
Shooting a fridge head-on is almost always a mistake. At an angle, it reflects the cabinets across the room, which looks natural. Shot head-on, it reflects whoever is holding the camera.
Editing kitchen photos
A kitchen photo straight from a phone usually needs three things: removing the yellow cast, recovering detail in the window and straightening the verticals by a degree or two. You can do that manually in Lightroom or your phone's photo editor. Lightroom's Upright tool handles the verticals well; white balance can take a bit of trial and error when the room has two or three lighting colours.
Real Estate Camera's Enhance does all three in one pass. It corrects lighting and white balance and straightens verticals in 20 to 60 seconds for 1 credit. It doesn't change the cupboards, benches or anything else in the room, and it won't replace the view outside the window with a better one.
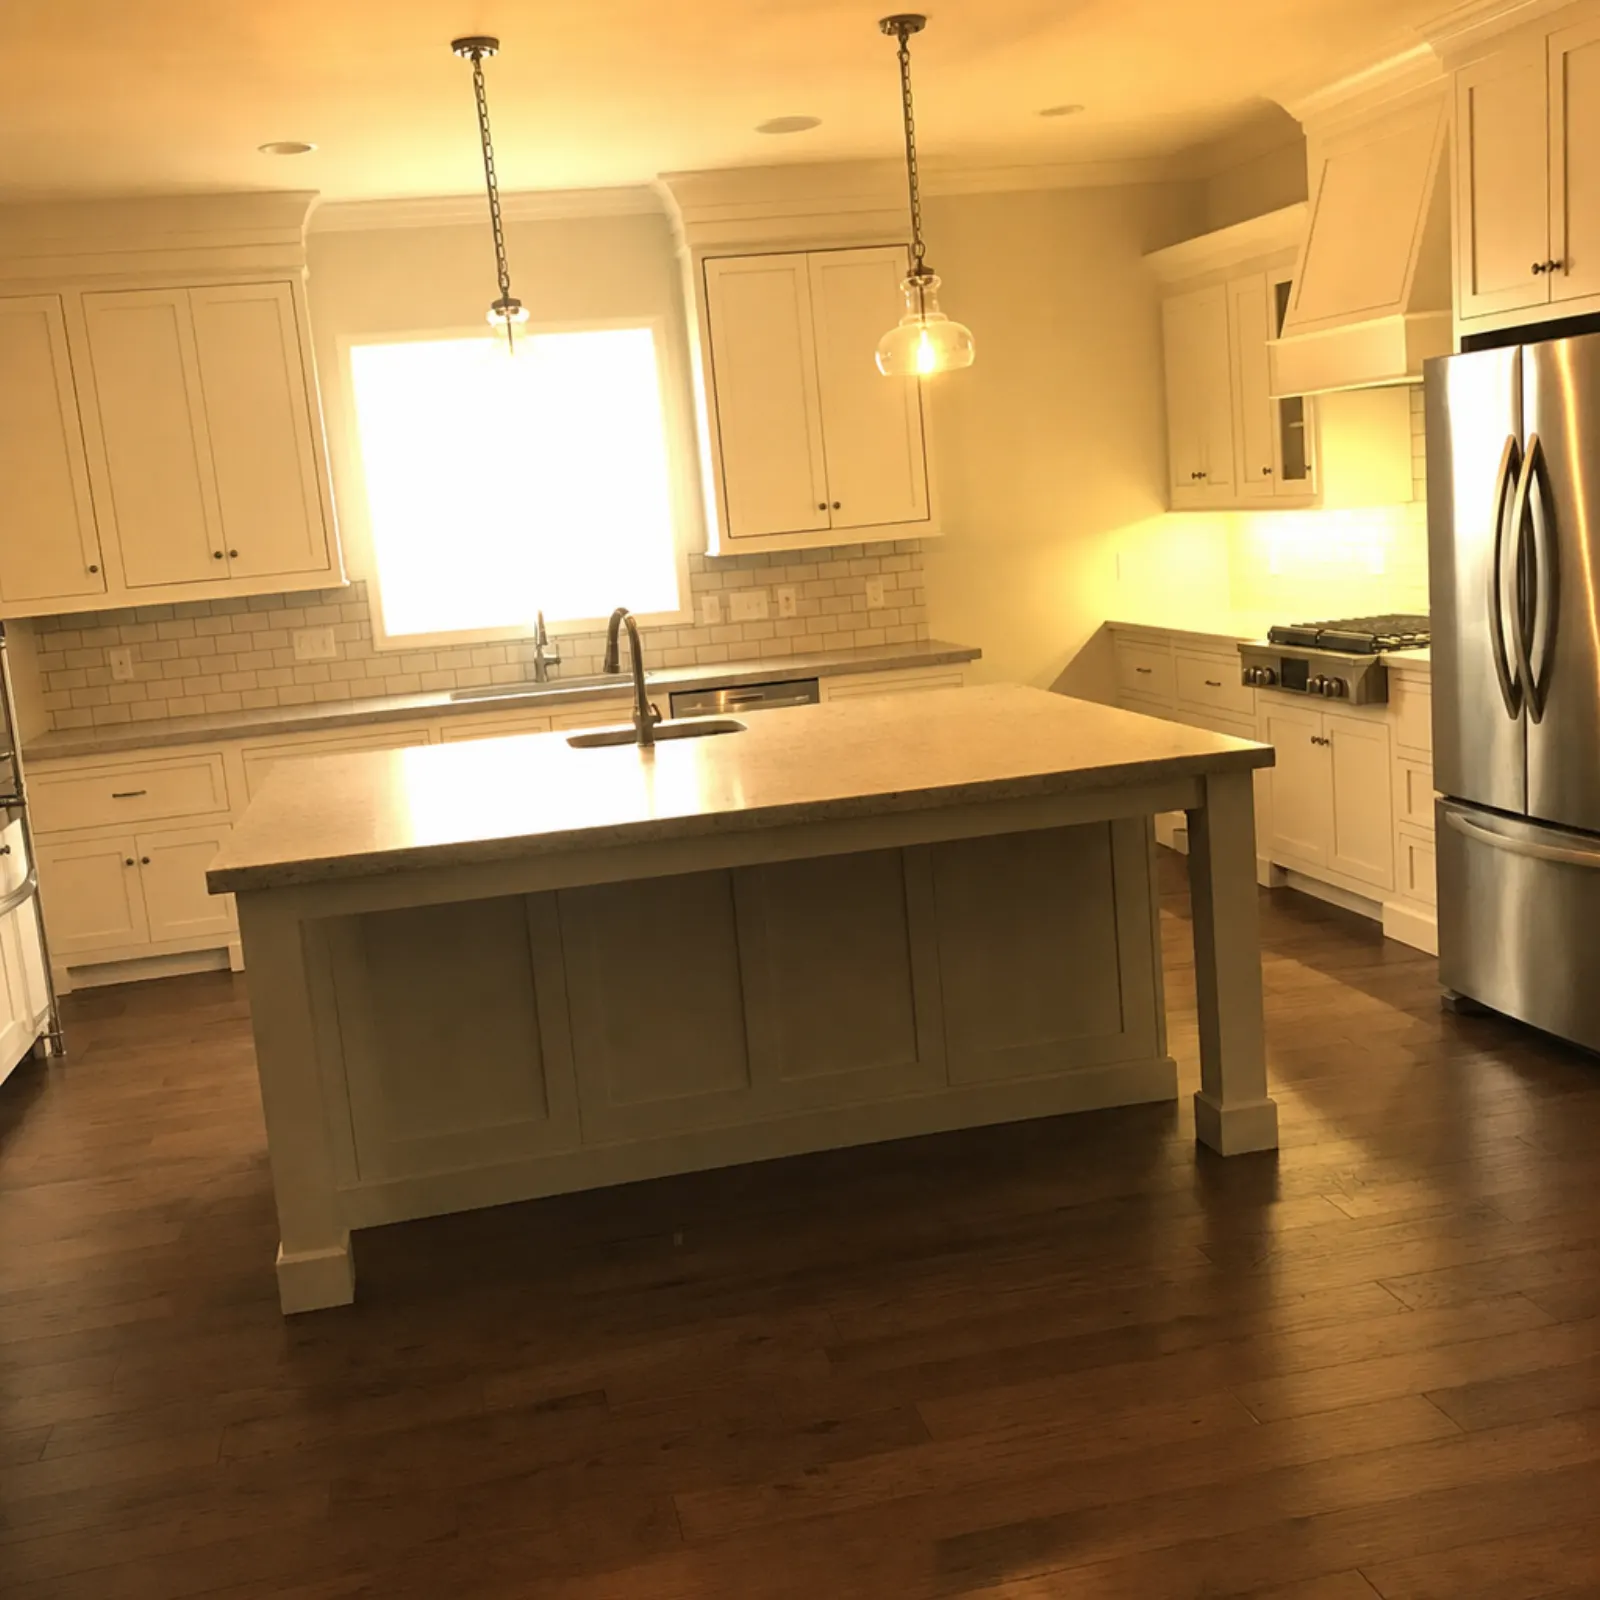
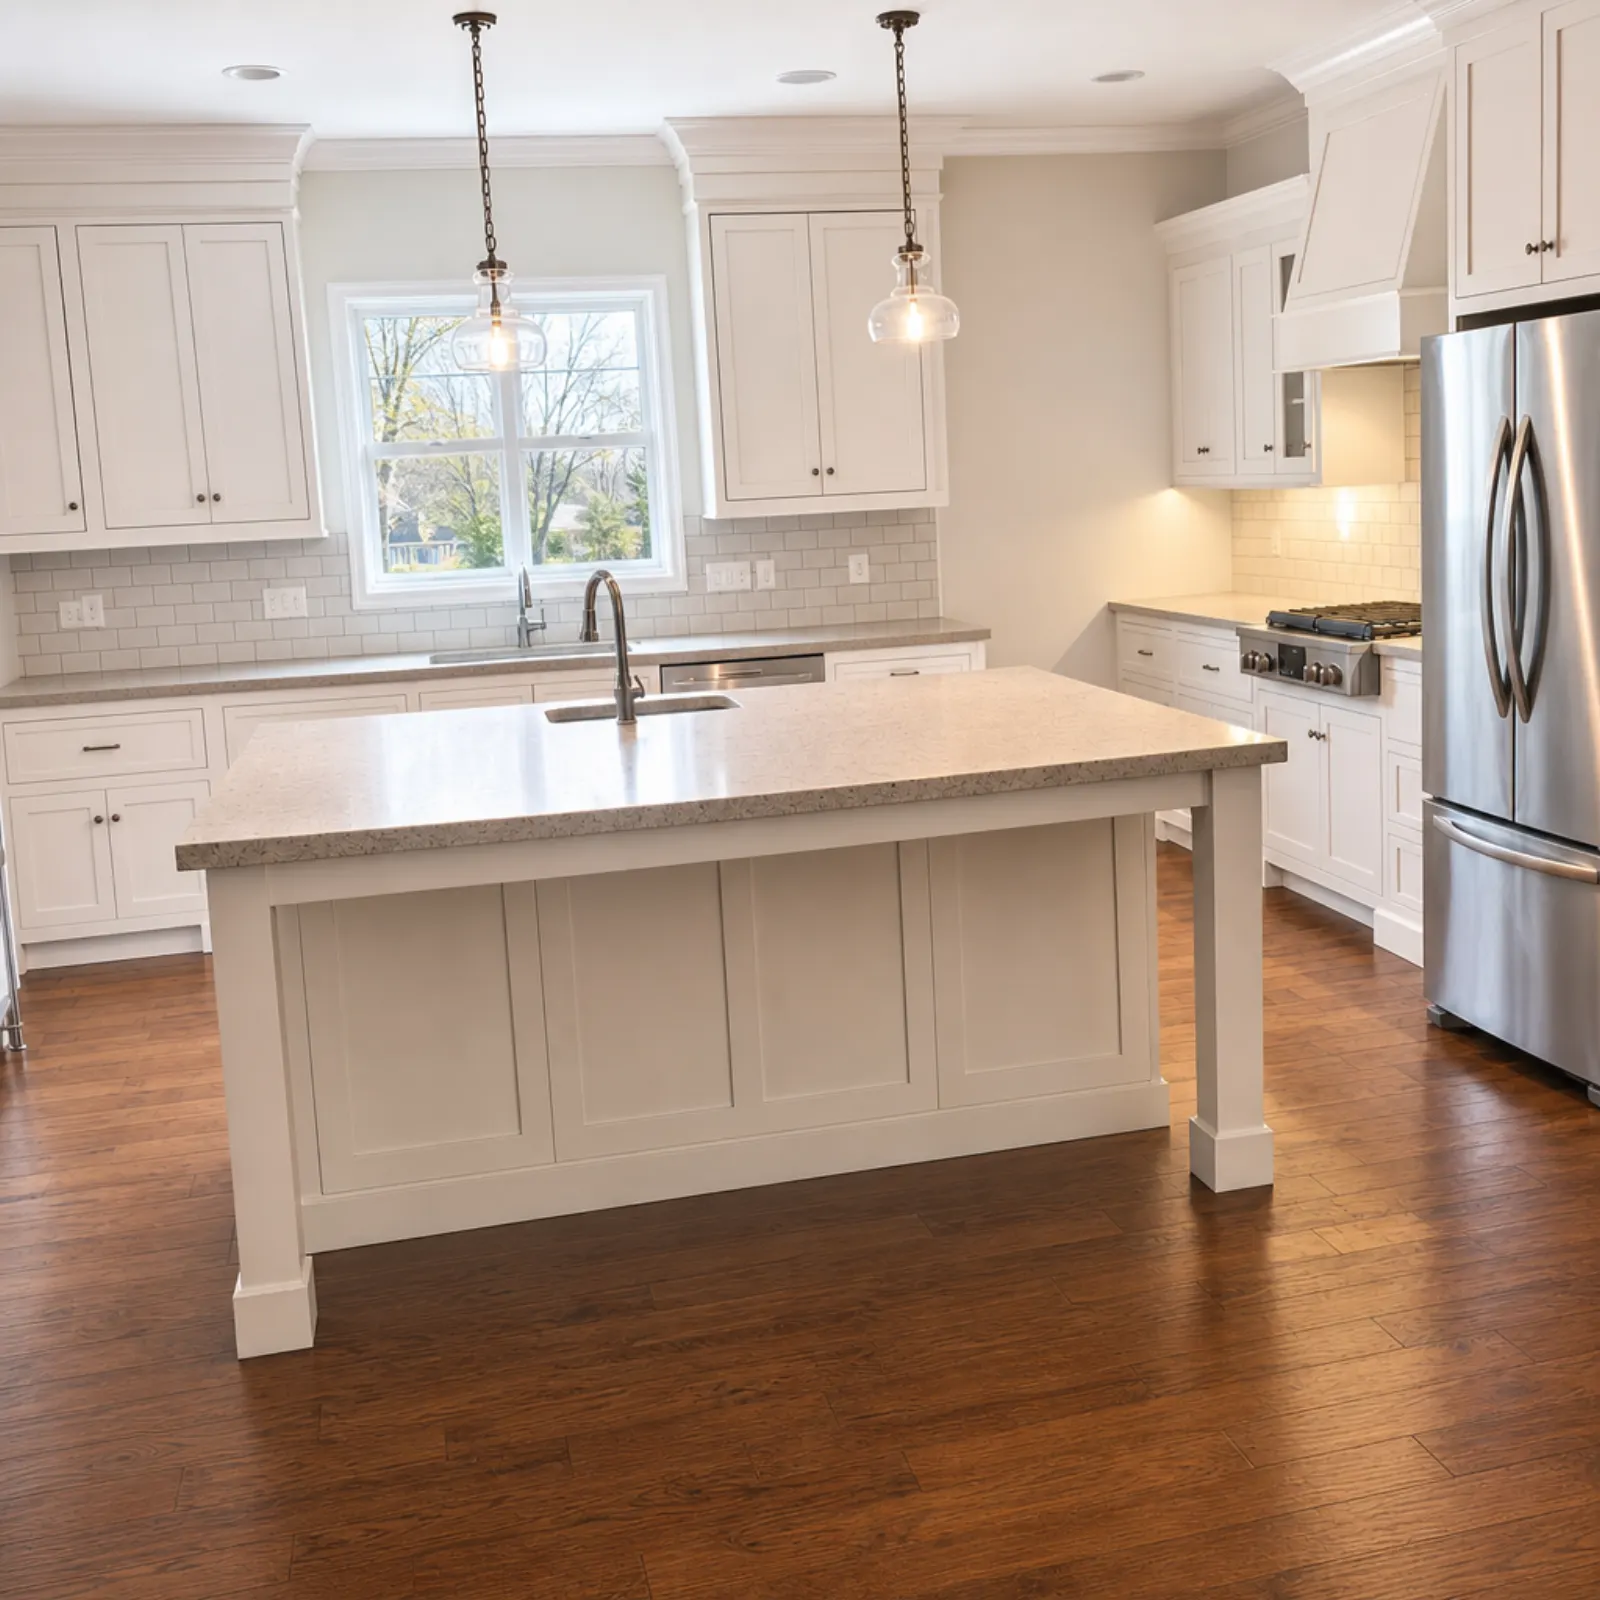
Look at the before photo for a moment. The lights were on, the benches were clear, but it was still a difficult photo to use because of the colour. That's typical of a kitchen shot on a phone, and it's why I'd rather correct the colour afterwards than photograph a dark room.
If the seller's kitchen is empty and you're virtually staging the whole house, virtual staging includes kitchens as a room type at 2 credits per photo. Staged files are marked "virtually staged" in the app. Check virtual staging MLS rules before you upload, as boards differ in their labelling requirements.
A quick kitchen checklist
- Benchtops and sink cleared, fridge door clear. Stainless steel wiped down.
- Every light on, including under-cupboard and rangehood lights. Blinds open.
- Flash off.
- Hero shot from the corner with the most cupboards and the island.
- Camera a little above chest height, kept level, with a cupboard edge lined up with the grid.
- Exposure set for the cupboards, not the window.
- Check the fridge, oven door and microwave for your reflection.
- Reverse shot from the far side of the island.
- One detail shot at 1x, only if something deserves it.
The kitchen photos usually go right after the living room in the gallery. The room-by-room shot list covers the full order, and taking real estate photos on an iPhone covers the phone settings in more detail.
To shoot and edit the kitchen in one app, see the real estate photography app.
Fix the mixed lighting in your next kitchen photo. Start free: 1 credit.
Questions
What is the best angle for a kitchen listing photo?
Stand in the corner that captures the most cupboards and the island bench together, then take a second shot from the opposite side, often from behind the island bench looking towards the family room. Only shoot straight on if the kitchen has a single run of cupboards.
How high should the camera be in a kitchen?
A little above chest height, so the benches read as surfaces rather than thin edges. Keep the camera level. Raising it is fine; pointing it downwards is what makes the cupboards appear to lean.
Should the kitchen lights be on in listing photos?
Yes. Switch on the ceiling lights, pendant lights and underbench lights. You can correct the warm colour they add afterwards, and dark corners beneath the wall cupboards look worse than a slight yellow tint.
How do I stop my reflection showing in a stainless fridge?
Shoot the fridge at an angle rather than straight on, step out of its line of reflection, and use your phone's timer or a remote, if you have one. Check the oven door and microwave too.
What should be on the counters for kitchen photos?
Almost nothing. Put away the toaster, knife block, dishwashing liquid and sponge. The same goes for mail and fridge magnets. Leave one or two items at most, such as a bowl of lemons or a chopping board.